How to Remove Background in Pixlr Remove BG (Step-by-Step Tutorial)
- August 12, 2024
- Sumaiya Siddika
- Last Updated On: August 01, 2025
Congrats, Pixlr users!! You found the perfect article out where you are going to learn – ‘How to remove background in Pixlr using remove BG tool?’ with in-depth details. Let’s dive in!!
You have to remove image backgrounds immediately?? But don’t have any knowledge about how to remove the background from an image?? — Then you can go with the Pixlr AI-powered software. This can be the best and one-stop solution for amateurs and who don’t have any design knowledge.
Besides removing or changing the background, you can do other tasks related to image editing with this advanced AI Software. By the way, this article is going to be solely a solution for image background removal using Pixlr Remove BG.
Pixlr AI: Remove BG Tool
Pixlr AI platform is popular as an online photo & design studio with its group of several photo editing tools (apps). We will discuss one of them today, which is called Pixlr Remove BG.
Remove BG is a popular tool (App) of Pixlr, which solely works to remove backgrounds from images. It’s built with Artificial Intelligence – therefore, this tool is able to automatically detect the main subject and discard the background.
Therefore, users don’t need any graphic design skills – a simple guide can be enough to help them remove backgrounds easily in Pixlr’s background remover. And, I’ll share a step-by-step guide with you in this article so that you can easily complete your background removal tasks.
Why Should You Choose Pixlr for Background Removal Projects?
For the following key reasons, you can choose Pixlr Remove BG for your Background removal Projects:
- Instead of hiring a professional graphic designer and spending money, easily remove unwanted backgrounds from your images by yourself using this AI. Pixlr declares that Pixlr Remove BG is intentionally designed for amateurs to professionals — E-commerce sellers, professional designers, content creators, and even school teenagers can effortlessly access & use it.
- Pixlr’s Remove BG tool is built up with Advanced Artificial Intelligence, which is well-trained to detect foreground elements (such as people, cars, Shoes, animals, and other objects); therefore, it can accurately detect the subject & objects and automatically remove the background. Also ensures the cut-out output comes with perfect edges.
- You can save both time and money if you decide to use Remove BG. Because if you go with the manual method to remove your image’s backgrounds, it will be time-consuming and require design skills. While Pixar’s AI has the capability to remove an image background automatically within a minute with some clicks (easy functionality).
- Moreover, you can properly complete your photo background removal project totally for free ($0). Even Pixlr’s other tools also offers a free version. — Although they keep premium features on their subscription option. But, their price plans are budget-friendly, so you can get a plan if you want to utilize and enjoy Pixlr Unlimited.
How to Remove Background in Pixlr Remove BG? — Follow Steps
Without an account, you can jump in and start working with Pixlr AI Image Studio. But, if you want to save what you’re working on and come back to it later — you have to make an account.
If you expect a guide about how to make an account/login on Pixlr, then click on it to read the blog guide.
Alright!! Let’s start the process of removing or isolating the background from an image using the Pixlr Remove BG. You can also pick an image and can follow & do the same steps I did here.
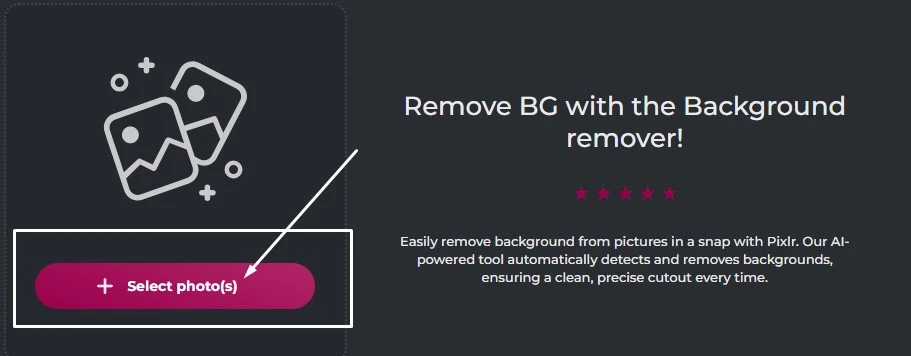
Open Pixlr’s Remove BG tool. Click on ‘Select Photos’ and upload the photo (which needs Background Removal) from your computer. Remove BG’s AI will detect the subject and discard the background.
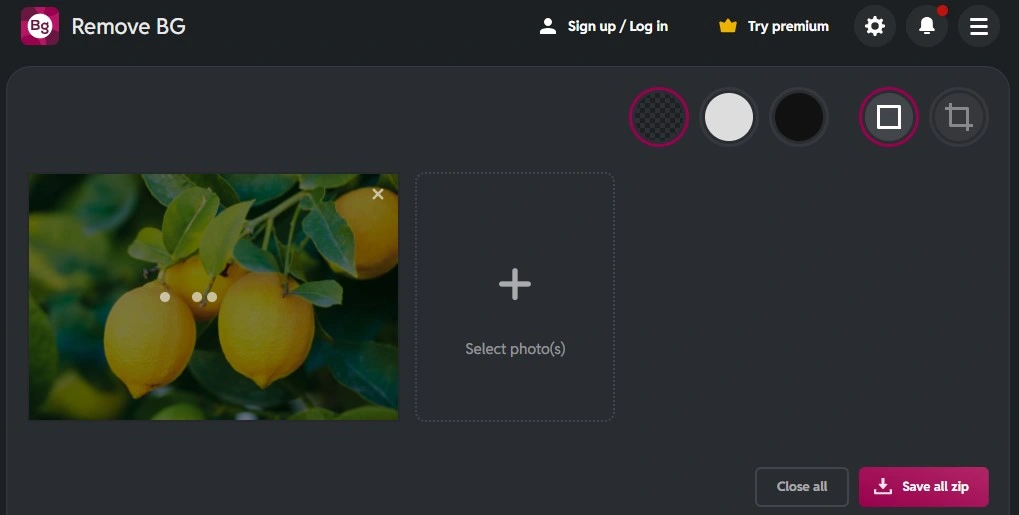
It is in progress… It will take a bit, but less than 1 minute…

As you can see, when I upload the image, the AI automatically removes the background and keeps the objects with a transparent background. And, it also offers me 3 options to choose from: Transparent BG, White BG, and Black BG.
If you prefer a white background behind the subject, then select the ‘white BG’ option. On the other hand, if you prefer a transparent background behind the subject, then there is no need to make any changes. And, for Black background, you can click on Black BG.
If you look attentively, you may catch that the AI couldn’t cut out the edges perfectly. Don’t worry!! It’s normal. This happens because of the object’s complexities… But it’s not tough to fix it. Follow the next Steps.
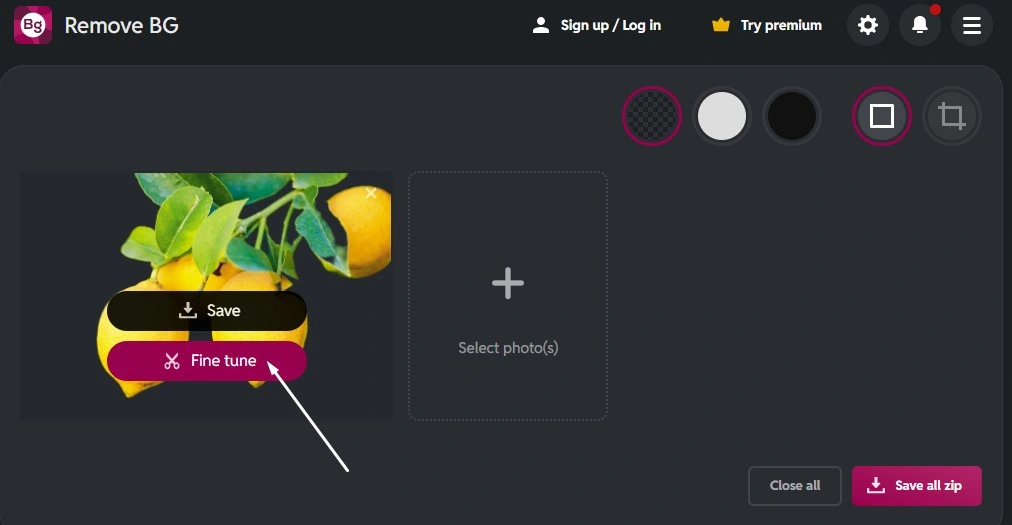
Simply hover the cursor over the image – you will see the Fine Tune option. Then, you’ll experience a new interface.
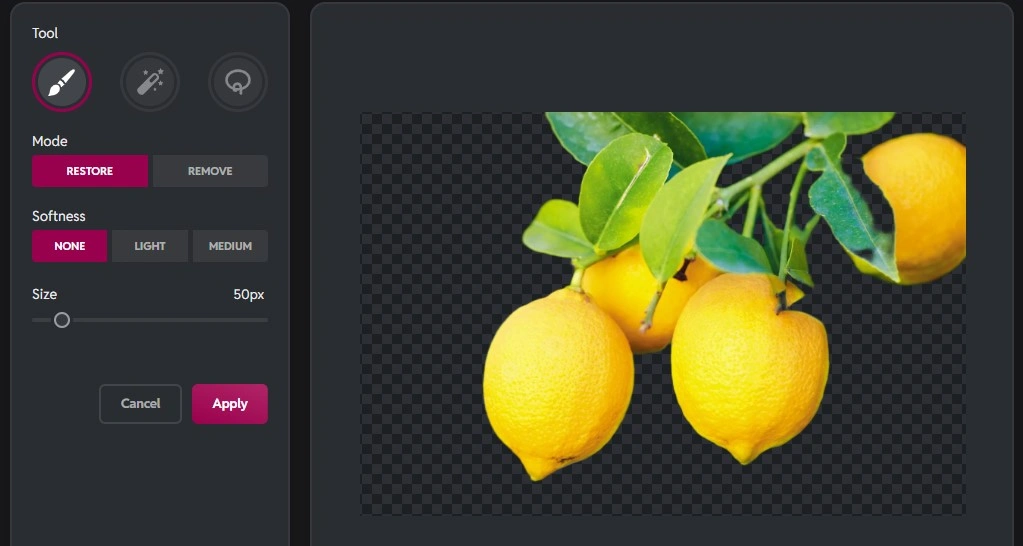
Here is it…. Look at the Left side – some tools are equipped for fixing/editing. These are only works for restoring and removing.
When you need to restore some parts (that were removed by AI), you can restore them with the ‘Restore‘ tool. On the other hand, when you need to remove unwanted edges (that Remove BG’s AI couldn’t remove), you can do it through the ‘Remove‘ tool.
In the above image, you may see the Lemons’ edges cut out with perfect edges, but I want to restore a part of the leaf (that is unfortunately removed by AI).
And, to do that….
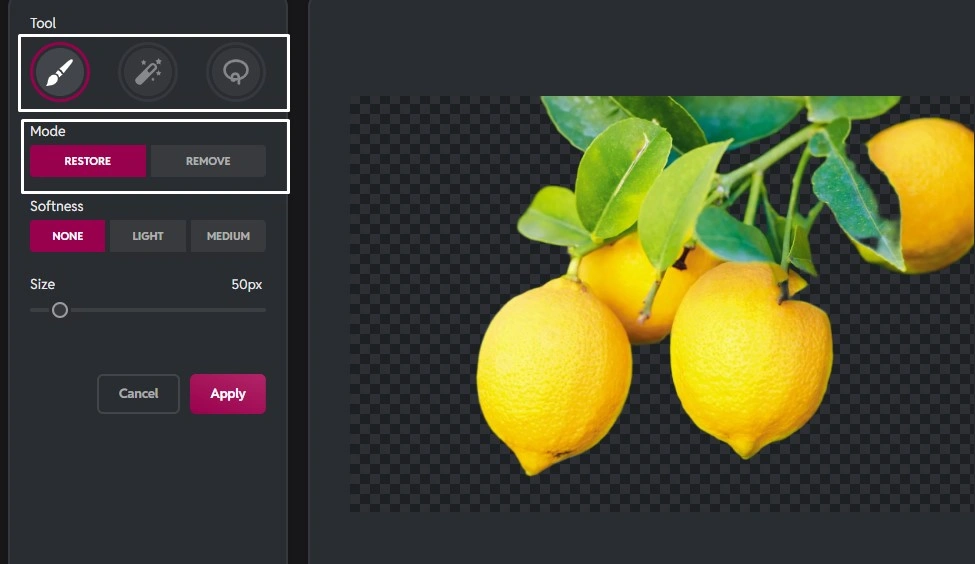
I selected the ‘Draw’ tool from ‘Draw,’ ‘Lasso,’ and ‘Magic.’ And, then, ‘Restore’ mode to get back the part. Then, I chose the brush’s softness ‘None’. And, I picked the tool size ’50px’.
Now, I’ll draw exactly on the areas where I want the restoration to occur. For that, first, I’ll zoom in on the image (by scrolling the mouse wheel forward) to properly apply it.
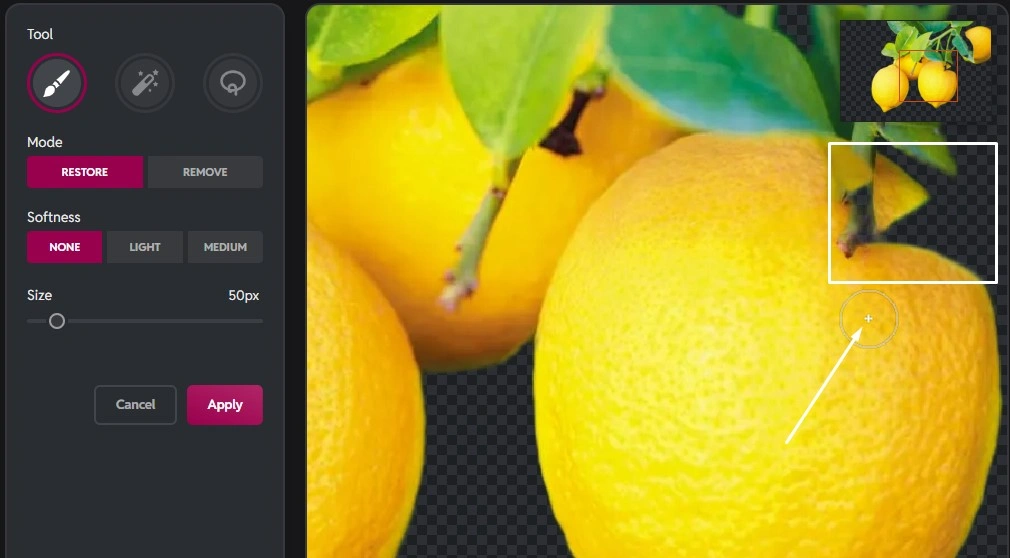
Look at the picture above – the circle represents the brush or tool that I took to restore the marked area. Carefully, I’ll click on the area to restore the part.
Look at the top right corner – here is a box shown after I zoomed in on it. You can select an area by dragging the red mark on the box,
[Note: If, unfortunately, you restore a little of the unwanted parts, you can remove them by selecting ‘Remove’ mode. Then simply press on the exact area.]
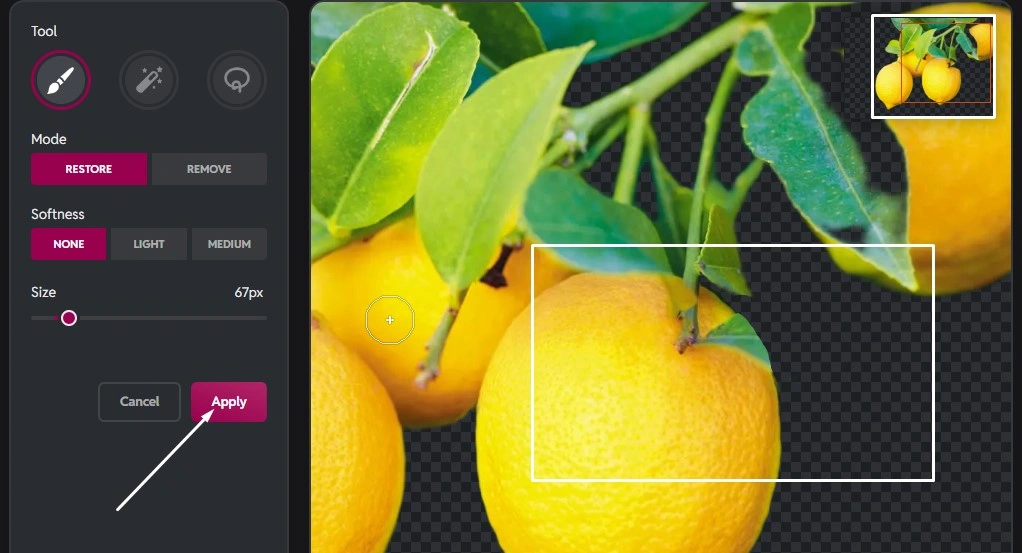
You may see that I restored the wanted area. Now, I’ll click on apply. Here is the process done.
Use Cases of Pixlr Background Remover
For some common cases, you can use the Pixlr Remove BG tool (app) for your background removal project. You can use for —
E-commerce Product Listings: Remove the messy backgrounds from your targeted product images and add white ones before listing them on Amazon, Shopify, and Etsy, among other marketplaces. — And, attract viewers to be customers.
Social Media Contents: Isolate the subject and create clean cutouts for social media promotion, profile pictures, or for memes. — Save both time & money and get design experience.
Graphic Design & Marketing: Do product or subject cutouts while maintaining perfect edges in Pixlr Remove BG and save them with Transparent BG as PNG files. Then, use them on flyers, posters, ads, and banners. — Save time and work as professionals.
Personalized Gifts and Printing: Create perfect-edge cutouts in Pixlr Remove BG and use them on mugs, T-shirts, or canvas prints. So that your custom designs become easier to look professional.
Eye-catching YouTube Thumbnails: Remove backgrounds, cut out graphic elements, and add to YouTube thumbnails to make them eye-catching. — Which may help to increase video click-through rates.
Pixlr Remove BG Honest Review (My Experience)
Literally, I found that Pixlr’s Remove BG is pretty good in providing adequate performance and AI removal accuracy. Pixlr designs the app interface in a way that is easy to access and find by anyone. — with a straightforward guide.
In Remove BG’s interface, you will see a step-by-step guide provided by Pixlr. I loved this part most — when a user is going to remove backgrounds from images in Pixlr Background Remover for the first time, they will get everything easily.
By the way, complex images (subjects or objects) may not be perfectly removed by AI. I faced the problem while I was trying to remove the background from a hair image.
Table of Contents
ToggleAbout Writer Sumaiya Siddika
Meet this guide writer, Sumaiya Siddika – A professional digital marketer, experienced in SEO, SMM, and editing. In Tech-lite blogs, she shares social media guides and valuable marketing software that are necessary in digital marketing, so that newcomers can benefit. She tests & shows the Outcome.

FAQ (Frequently Asked Questions)
Pixlr’s Remove BG app is completely free, with access to all features. That means you can complete background removal tasks and download the output for free.
Pixlr platform is an online-based software, so you have to use Remove BG with an internet connection (it’s required).
This accepts a wide range of file formats, including JPEG, PNG, and BMP.
Yeah, you can. Pixlr allows, even designed this tool to remove multiple image backgrounds at once.